
How to install wallpaper: our instructions
Andrea Riccardo GalièYou’ve received your wallpaper. Great! Here’s what to do next.
When it arrives
The first thing you need to do is check the quality and quantity of the wallpaper you’ve ordered. We can’t always guarantee that subsequent orders will be exactly the same colour. Ensure you have the correct amount of sheets and that there are no imperfections. This shouldn’t happen, but very occasionally one might slip through our quality controls.
Getting started
Surface
Beautifully hung wallpaper starts with the wall – so you need to make sure it’s in perfect condition. Your walls need to be clean, dry and as smooth as possible. Remove any old wallpaper, stains, and anything that could affect the surface, such as polish or grease.
If mould or mildew is a problem on your walls, you’ll need to sort this first before hanging your wallpaper. An excess of moisture can affect the hanging process and won’t give you such a beautiful finish.
For a smoother overall appearance, make sure your wall is an even colour before you start hanging. Different colours will give a different look.
Depending on the overall look you’re after, an uneven wall may add to the appearance of the wallpaper. If the wall is very uneven, it’s best to shave it before hanging.
If you want to use a primer, double-check that it’s a paper-specific one and that it’s completely dry before you start hanging, otherwise it will damage the paper.
If you’re hanging on plasterboard, unpainted plaster or on washable paint it’s important to make a base with a primer or the product you see in the picture. Then you can follow our instructions.

If your wall is painted with regular paint, you can follow the below instructions as normal.
How to prepare the wall
You should use sandpaper to smooth out any imperfections and a cement-based plaster to fill in any holes or possible hollows. You should remove any carpet from the walls either by steaming or using a cloth soaked in solvent diluted water.
Is the wallpaper only for walls?
Our paper looks great when it’s used to cover furniture, doors or anything else you can think of – some people even frame it and hang it like a painting! It’s not suitable for all surfaces, though. We wouldn’t recommend hanging our paper on metal or glass as they’re just too smooth and it won’t stick. The same goes for glossy surfaces, such as lacquered wood (unless you’re willing to sand them first)!
You’ll need to apply the wallpaper differently depending on the finish of your furniture. If it’s plywood you can lay the wallpaper as if it’s a normal wall, but if it’s laminated or polished you’ll need to sand it first. And what about chipboard and wood fiber? They have uneven but not sandable surfaces. It's better to prepare a base before laying it. You can use Metylan Ovalit that we have recommended above or a suitable glue for our paper. If you have any queries feel free to contact us!
After applying the paper on furniture, we suggest coating the wallpaper with a layer of transparent paint so that it can be easily wiped clean. We also recommend doing this if you hang your wallpaper in a damp room, such as a bathroom. Here are some products that work well with our paper.


It’s also important to remember that our wallpaper is real paper, so it shouldn’t be put near heat sources – avoid covering used chimneys or very hot radiators.
Hanging your wallpaper
So, your walls are perfectly prepared and now it’s time to start hanging!
The first thing you need to do is make sure you have all the necessary tools.
We don’t recommend wearing any rings whilst hanging the paper as they can rip and tear it. There’s also no need to use sponges.
Equipment
Make sure you have:
- Wall brush
- Glue
- Cutter
- A surface or table
- Laptop, tablet or smartphone to watch the video tutorial
Step by step – brief
Diluting the glue
The glue will arrive in powder form. To use it simply:
- Pour the entire contents of the sachet into a clean bowl and add 1.5 litres of cold water.
- Mix everything together for at least 15 seconds, wait for 2-3 minutes and mix again for a further 15 seconds.
- Let the mixture sit for 20 minutes and then mix one last time.
Don’t worry if the mixture looks very liquid – it should be and it will firm up over time.

Didn’t buy any glue? Any professional powdered paste for light and medium wallpapers should work. We recommend Metylan Universal or Metylan Normal. As well as the weight of your wallpaper, it’s important to think about the kind of surface you’re hanging it on (absorbent, non-absorbent, painted etc).


If you don’t have time to finish hanging the wallpaper in one day, the glue will last for 24hours if left at room temperature. Just add a little water the next day and stir. It’s not recommended to use the glue after 24 hours.
How to hang
Here’s a brief overview of how to hang your wallpaper. We’ll go through each point in detail after.
- Cover the back of the sheet of paper in a layer of glue and leave it to dry for 10/15 mins (this step is important in letting the paper expand and contract).
- When it’s dry, cut the paper to your required measurements.
- Apply a layer of glue to the wall.
- Again, apply a layer of glue to the back of the sheet of wallpaper but this time don’t let it dry.
- Stick your first sheet of wallpaper to the wall (the wall must be wet).
- Run your hands over the wallpaper to remove any air bubbles.
- Continue with this method until the whole area is covered.
Don’t worry if you notice that the wet, glued sheets are a different size to the ones without glue. Once the glue dries the sheets return to their original size. This is completely normal because our wallpaper sheets are made from untreated paper. In fact, our entire manufacturing process is sustainable and the final product 100% recyclable. It’s vegan, odourless and we only use water-based inks and never solvents.
Step by step – detailed
- Do not apply the glue to the patterned side of the paper. Only to the back.
- To measure your wall, start at the bottom (not including skirting board or baseboard) and allow an extra 1.2 inches (3 cm) at the top and bottom. This will ensure you don’t cut it too short and that you have space to play with when matching up the pattern.
Only cut your paper once it’s dry.
When cutting the sheets, make sure you perfectly match up the design if it’s on 2 sheets.
- Paint an even layer of glue over the entire wall.
- For the second time, apply glue to the back of the sheet of wallpaper without letting it dry. For speed, you can do 4/5 at a time.
- When hanging your wallpaper, start from the window or balcony (if you have one). If not, start from the edge of the wall – and definitely not the middle. If you’re covering a sloping wall, start at the top.
Make sure you align the sheet with the edge of the wall, applying the lower half of the back side of the wallpaper first.
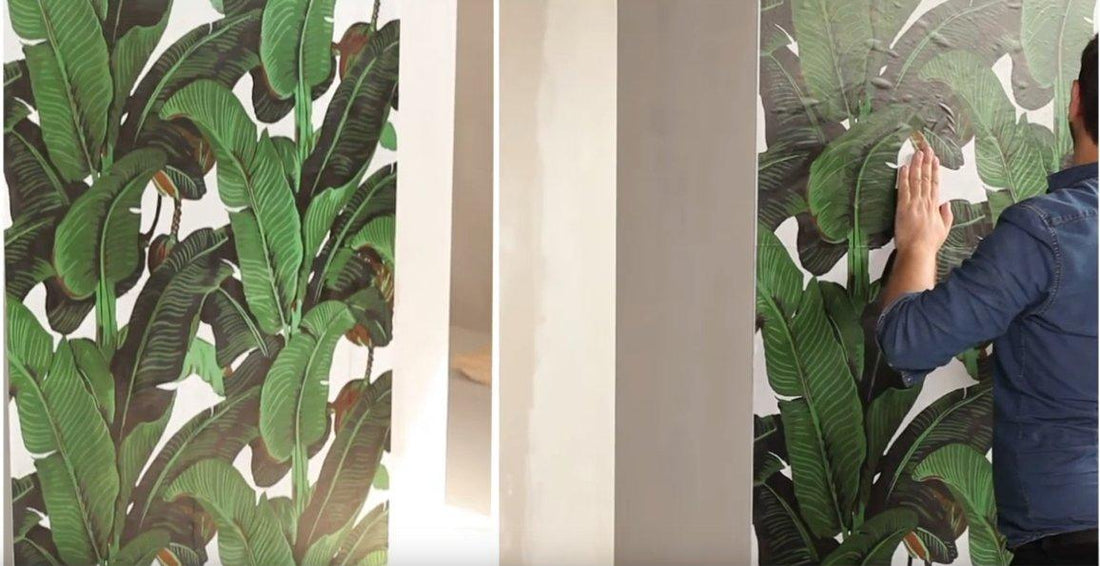
- Gently smooth the sheet down, removing any air bubbles. Don’t worry if there are a few left – as the paper dries the bubbles will fade (as shown in this picture). Remove any extra glue using the brush. Don’t use something abrasive like a sponge.
- This is when you need to be a little patient! Wait for the glue to fully dry. When it is dry, you’ll need to cut the excess paper from the top and bottom of your wall. Lift it up slightly and use a pair of scissors to cut along the edges.
If you’ve covered mains sockets, cut an X over them (without scratching the socket’s plate) and then carefully cut along the edges.
Pattern
Some designs are staggered. We recommend you look at the pictures and videos below. If you have any doubts please write to us.
Pictures


Follow this pattern also for Velvet Floral, Pink Velvet Floral, Dark Velvet Floral, Dutch Floral, Custom Dutch Floral and Floral Boho.

Follow this pattern also for Pink Clouds, Vintage Clouds and Cactus.
Videos
How to take care of your wallpaper
If you’re worried that humidity may be a problem, buy a specific product to protect the wallpaper, such as varnish or resin.
How can you remove the wallpaper?
Our wallpaper is really easy to remove (from walls and wooden furniture). Simply add a little hot water with a sponge and peel away. For those more stubborn bits, you may need to add steam. For more advice, check out our video.
It may take a little practise, but we promise you’ll get there! If you have any questions feel free to get in touch!